Build Your Own Custom Neural Network Pattern Match Model
Here is a quick primer on how to build your own sophisticated Neural Network based Pattern Match Model using our free App "FundSpec" available on the AppStore and GooglePlay.
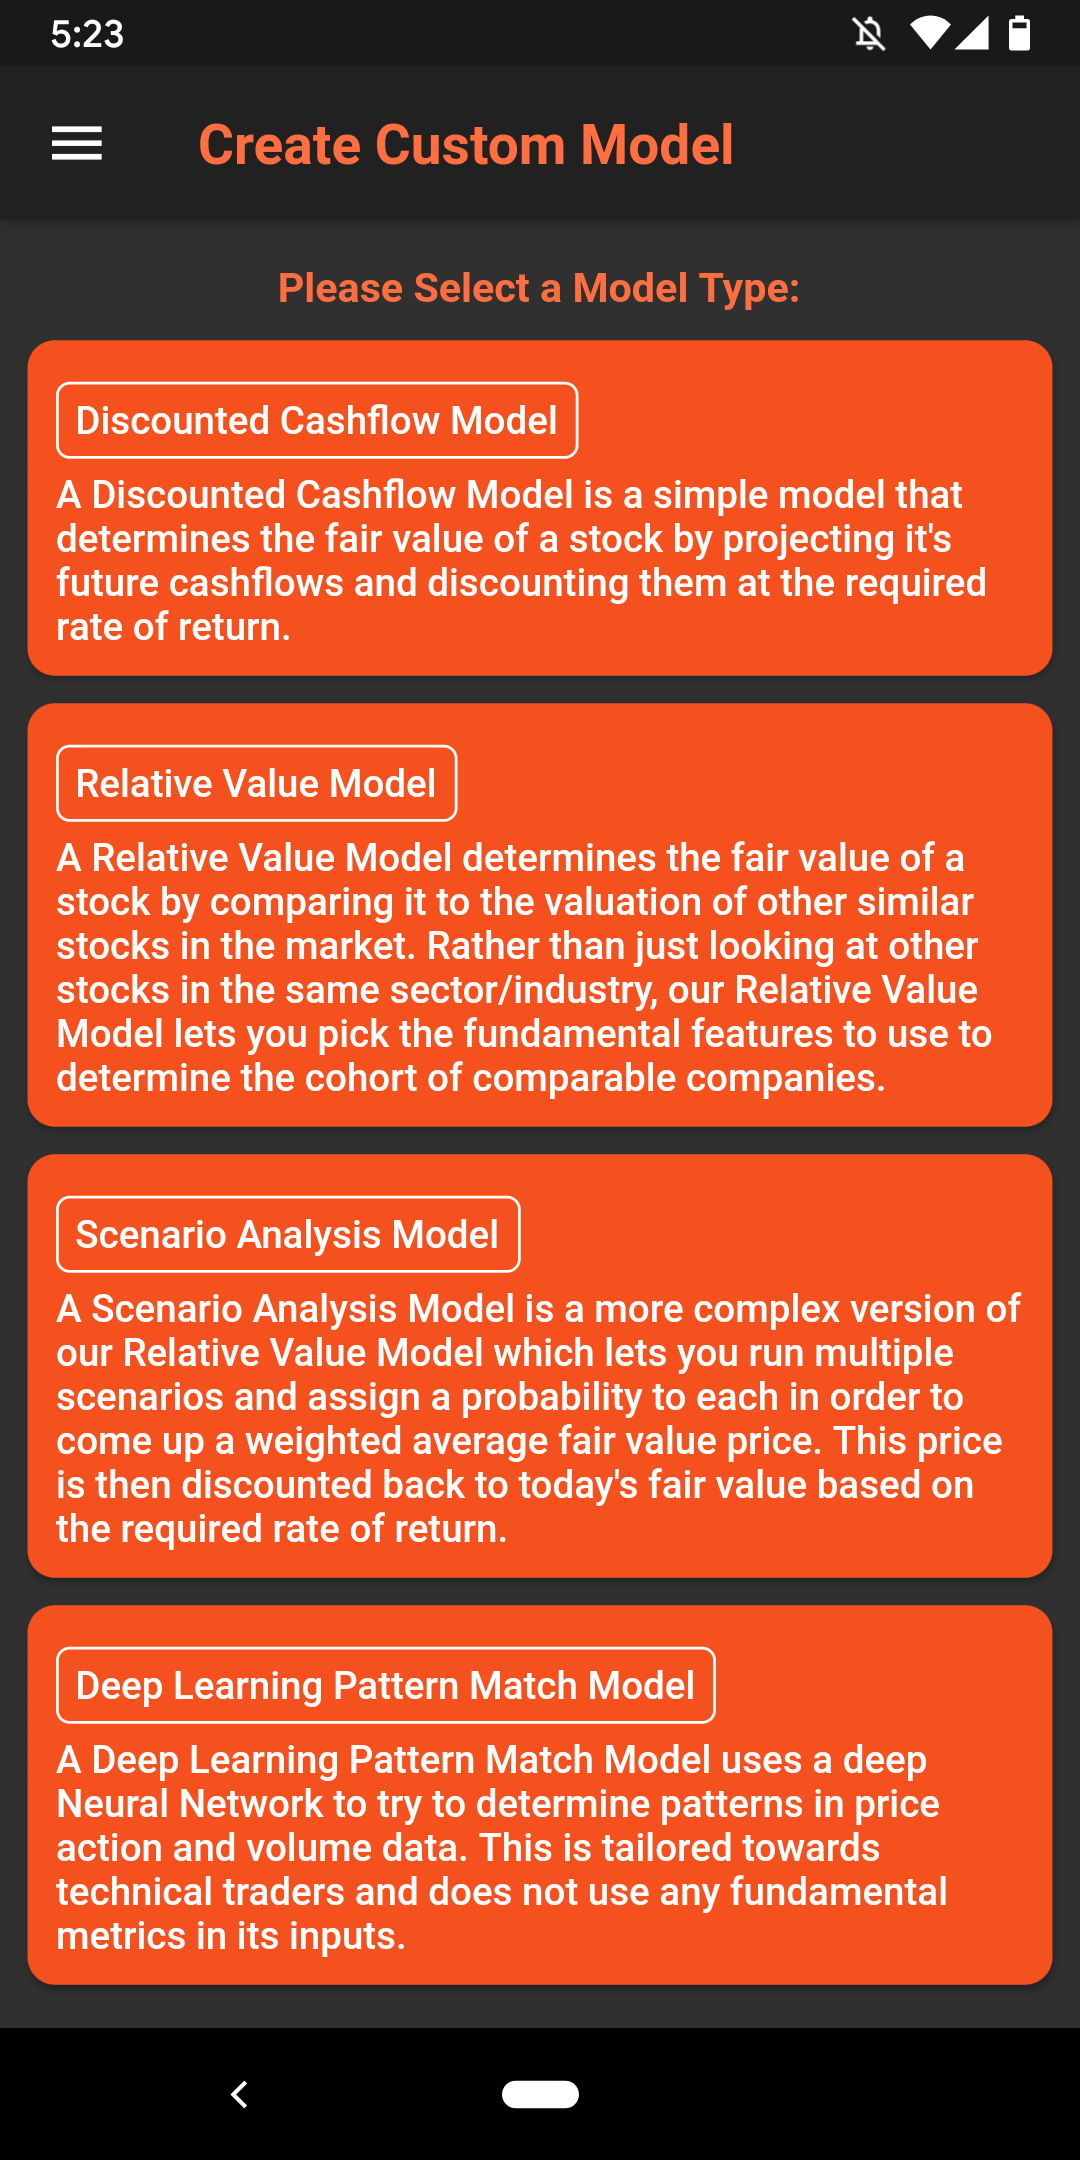
Step 0: Download our free app FundSpec on the AppStore & Google Play. Hit the menu button on the top left and select "My Custom Models" to create a new model. Select the Deep Learning Pattern Match Model from the options shown.
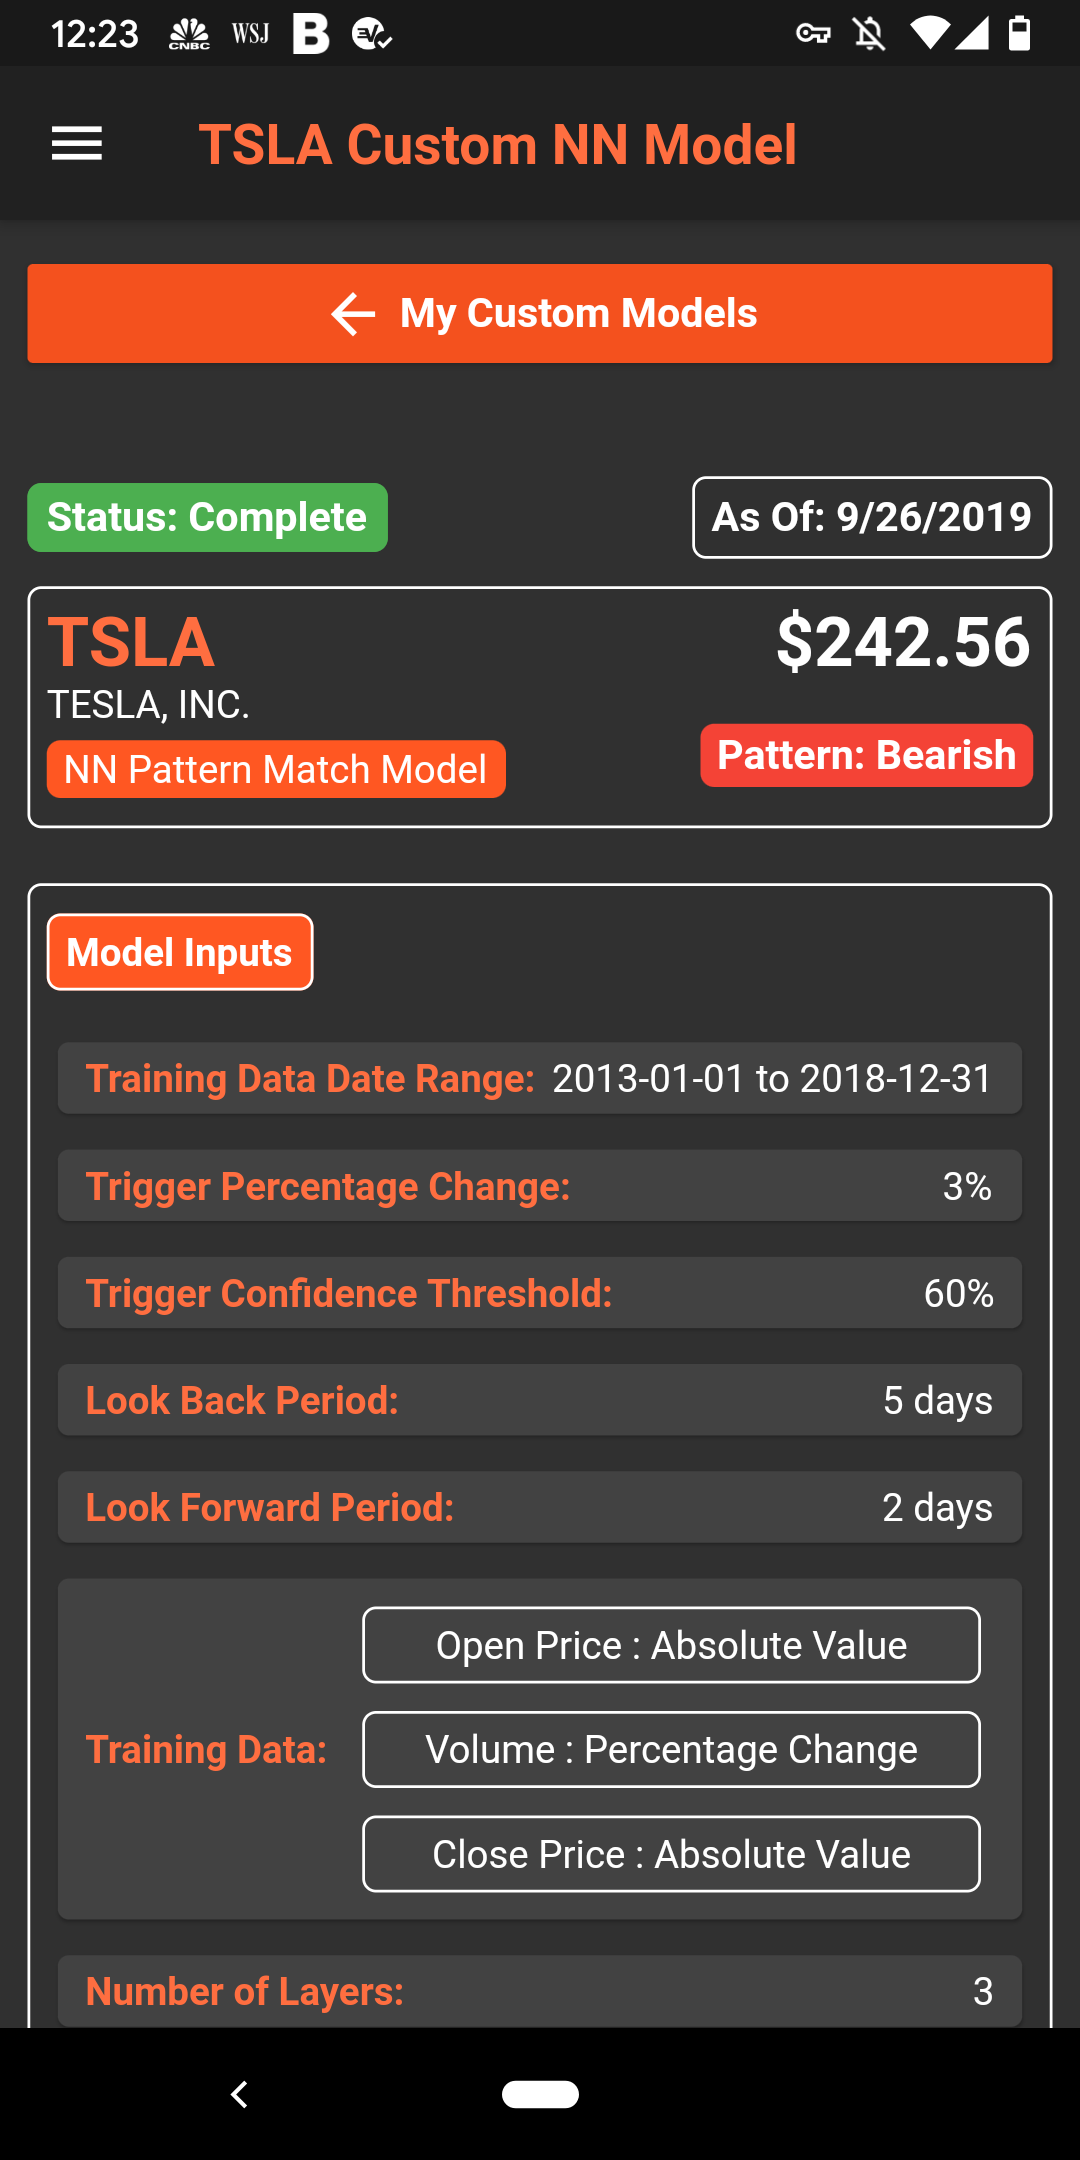
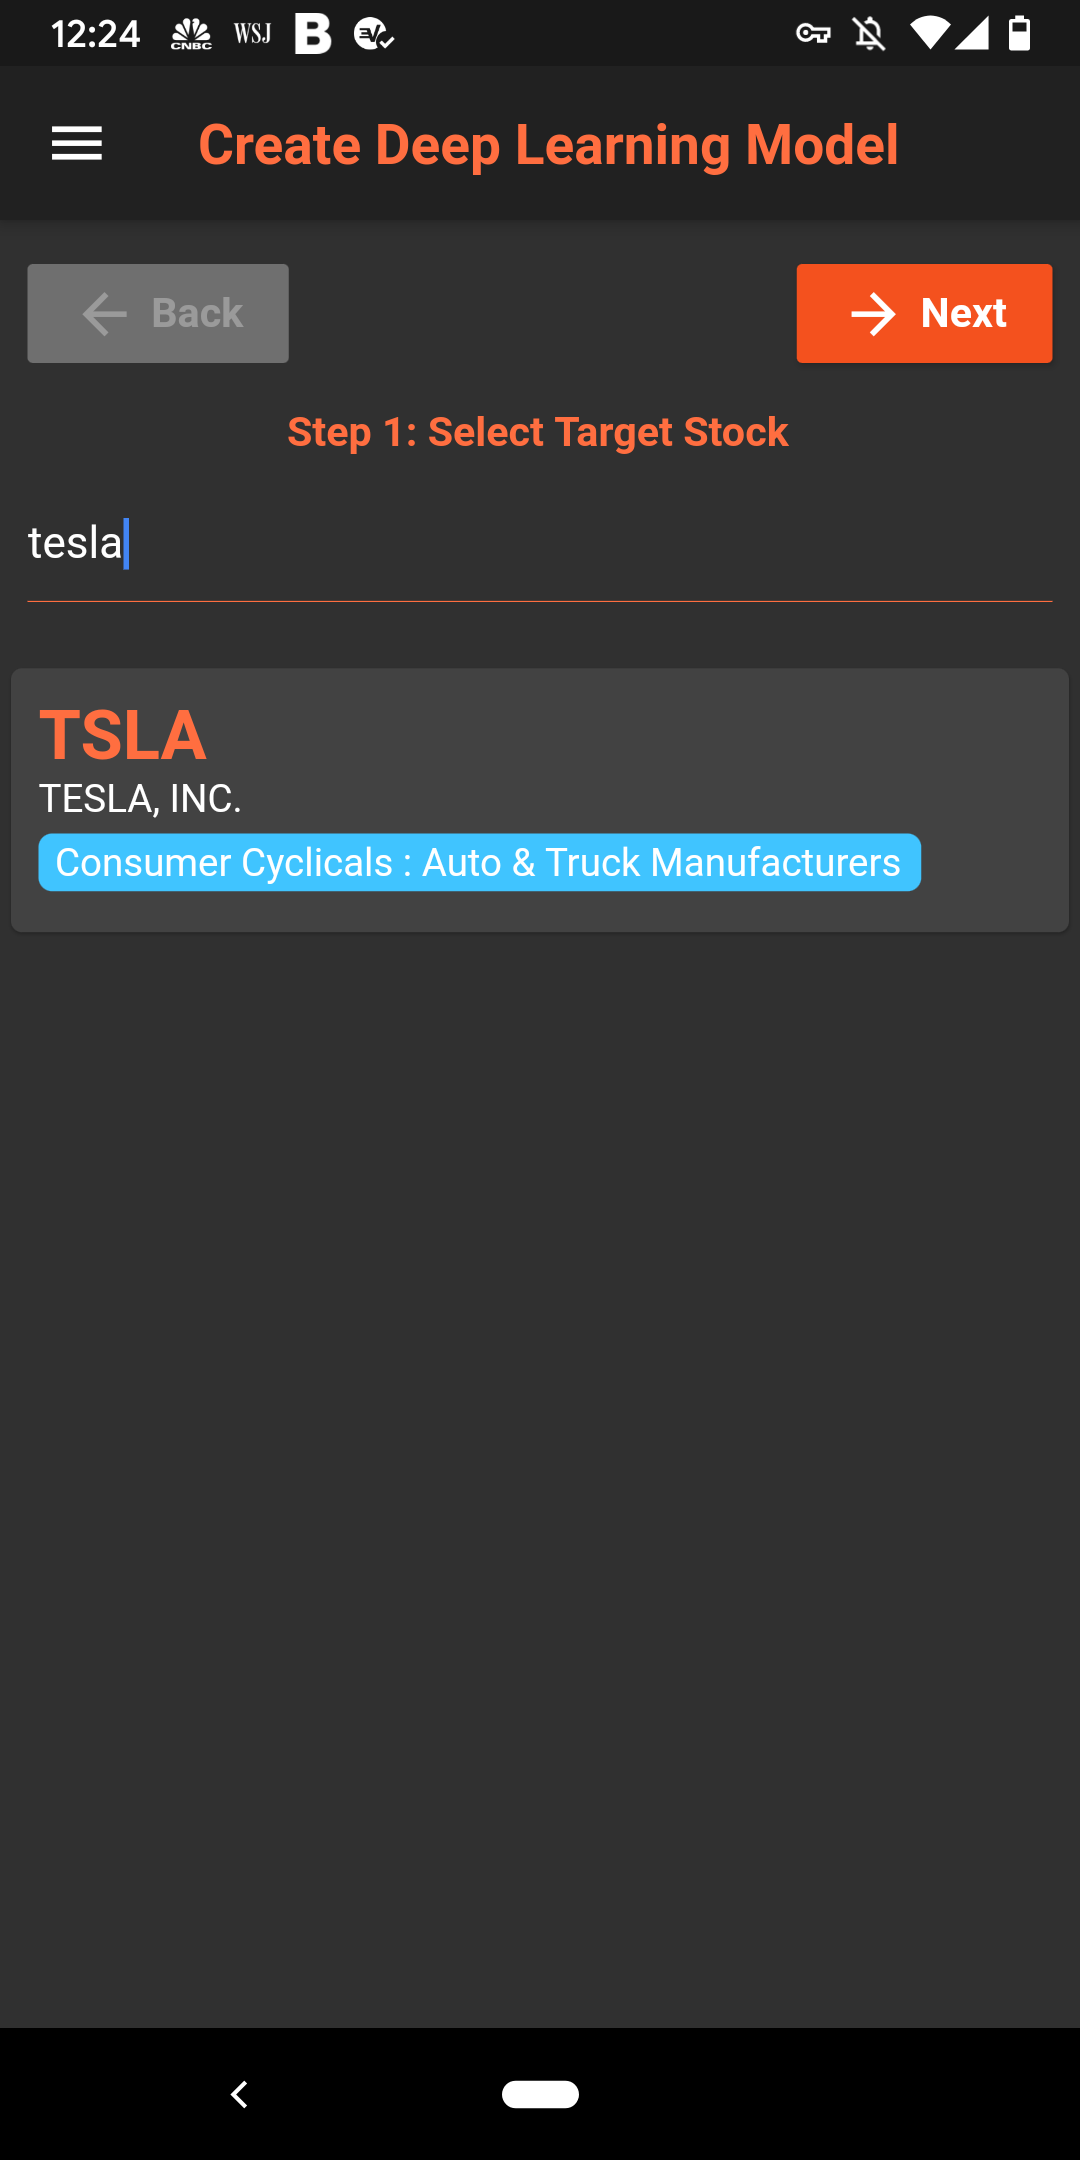
Step 1: Select your target stock. Here we will use Tesla as an example.
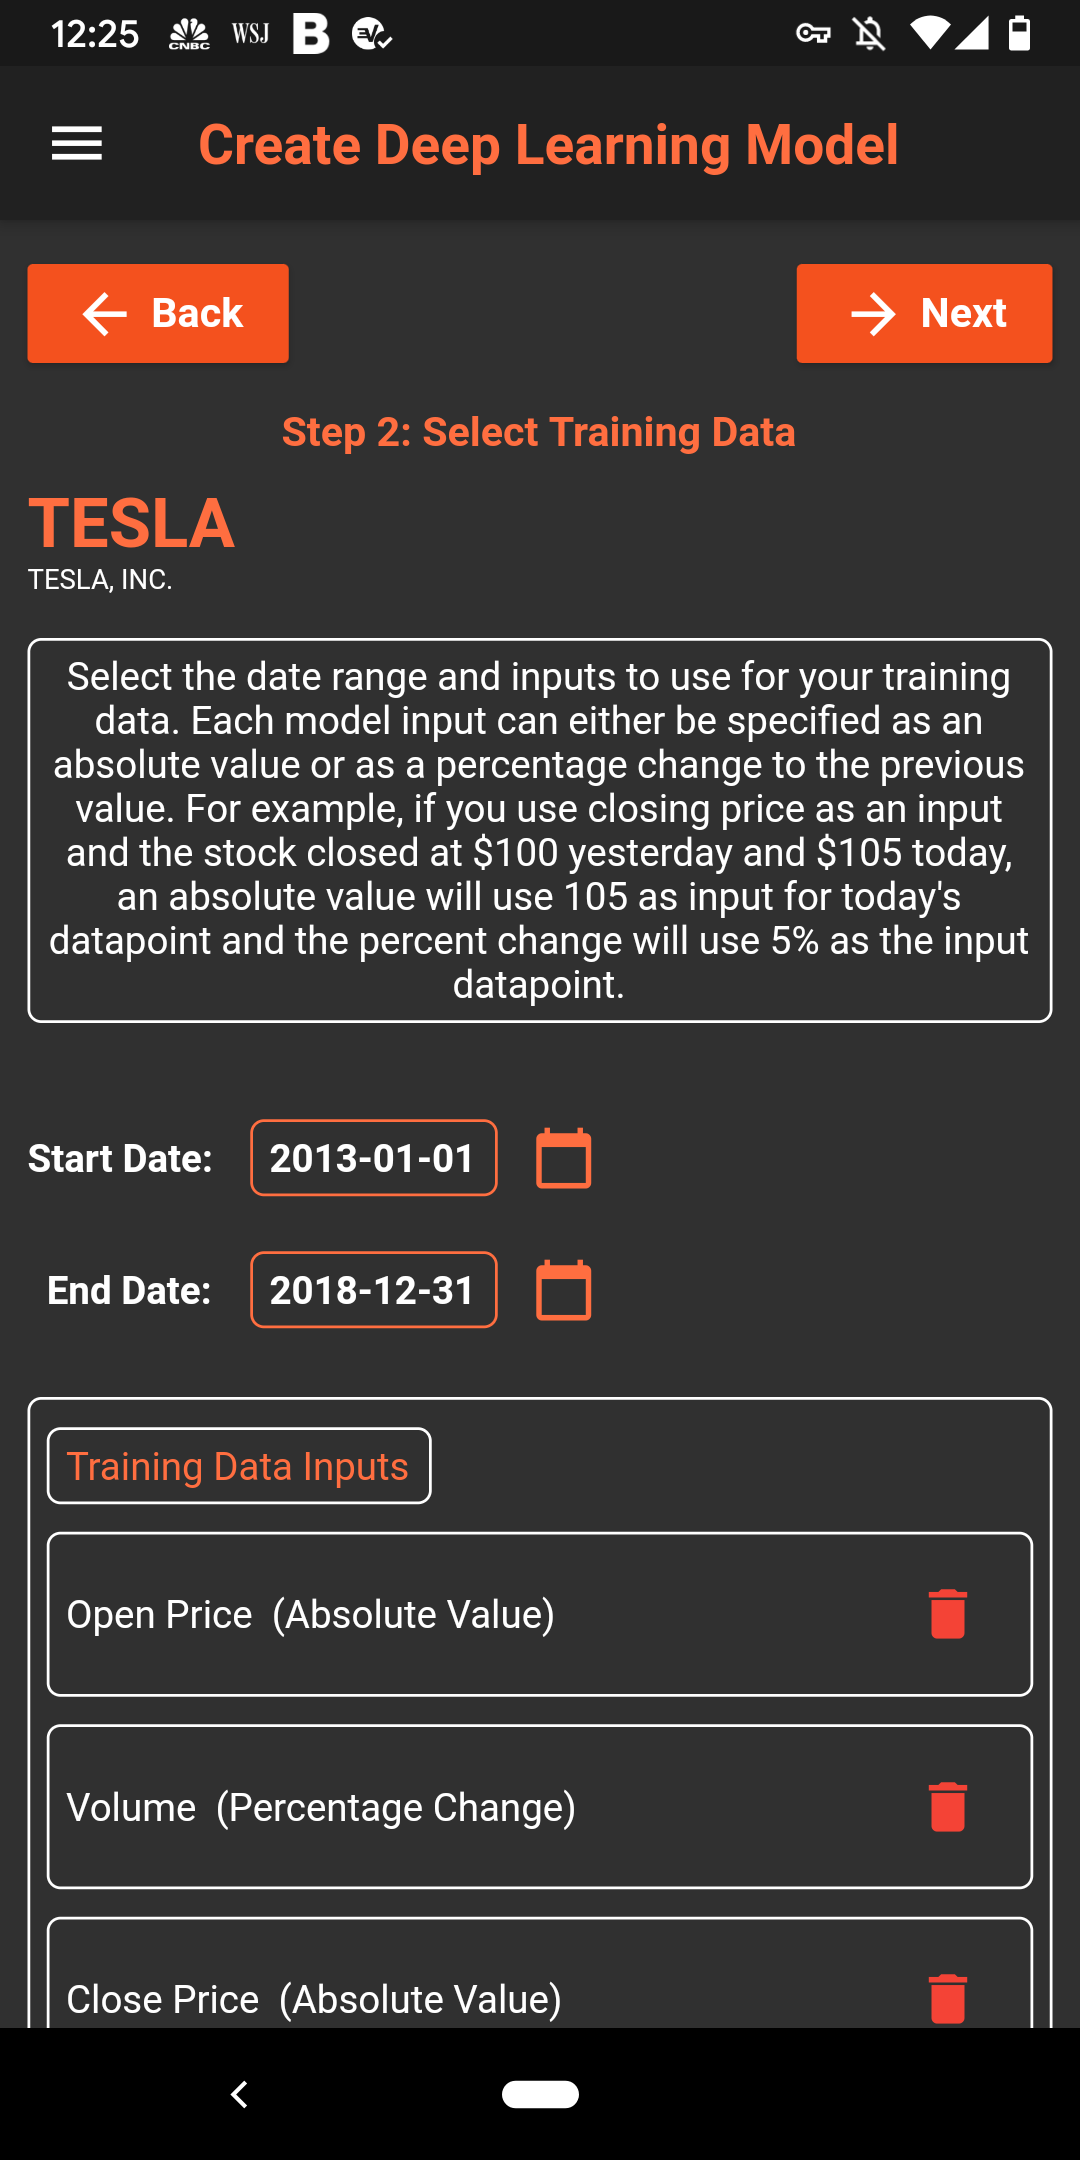
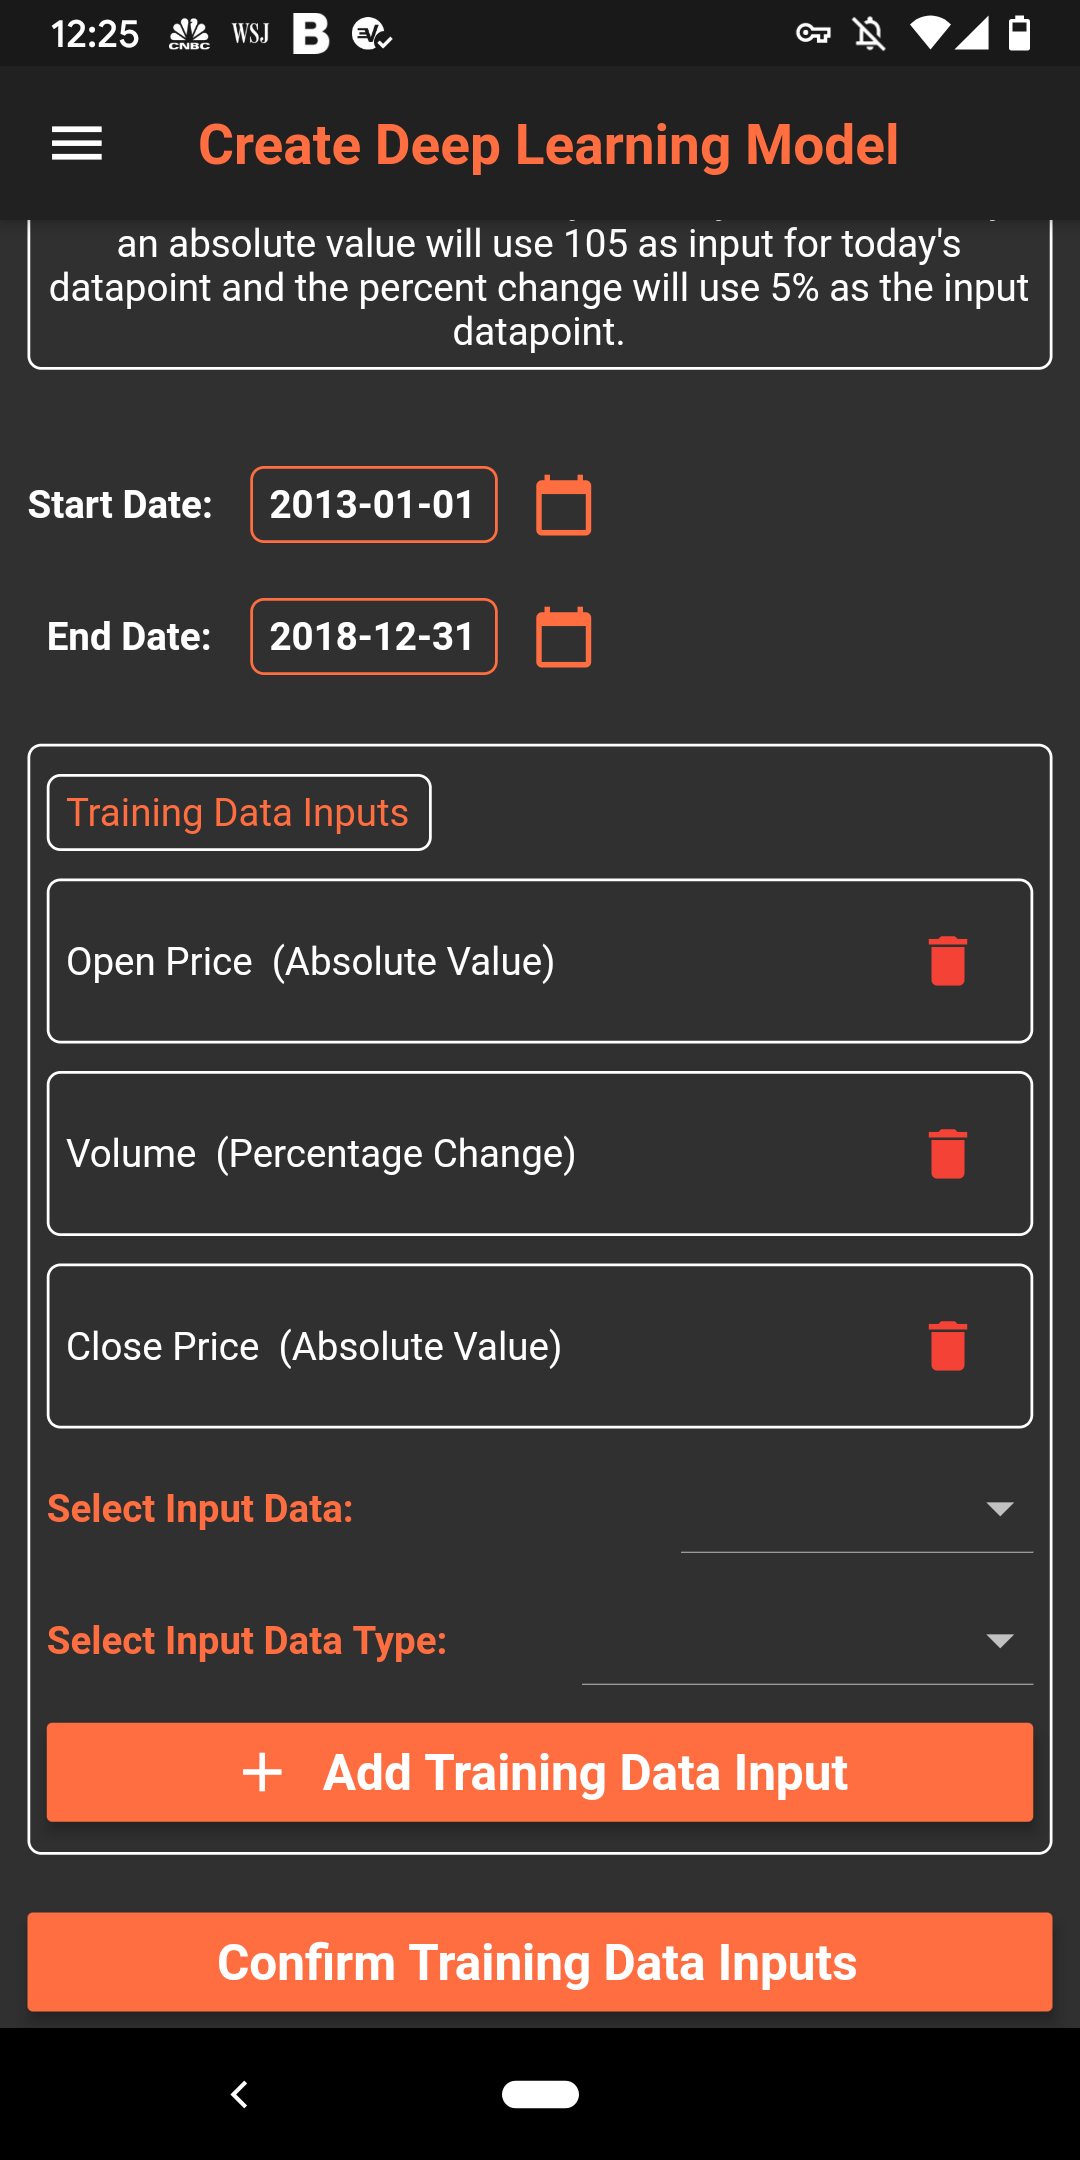
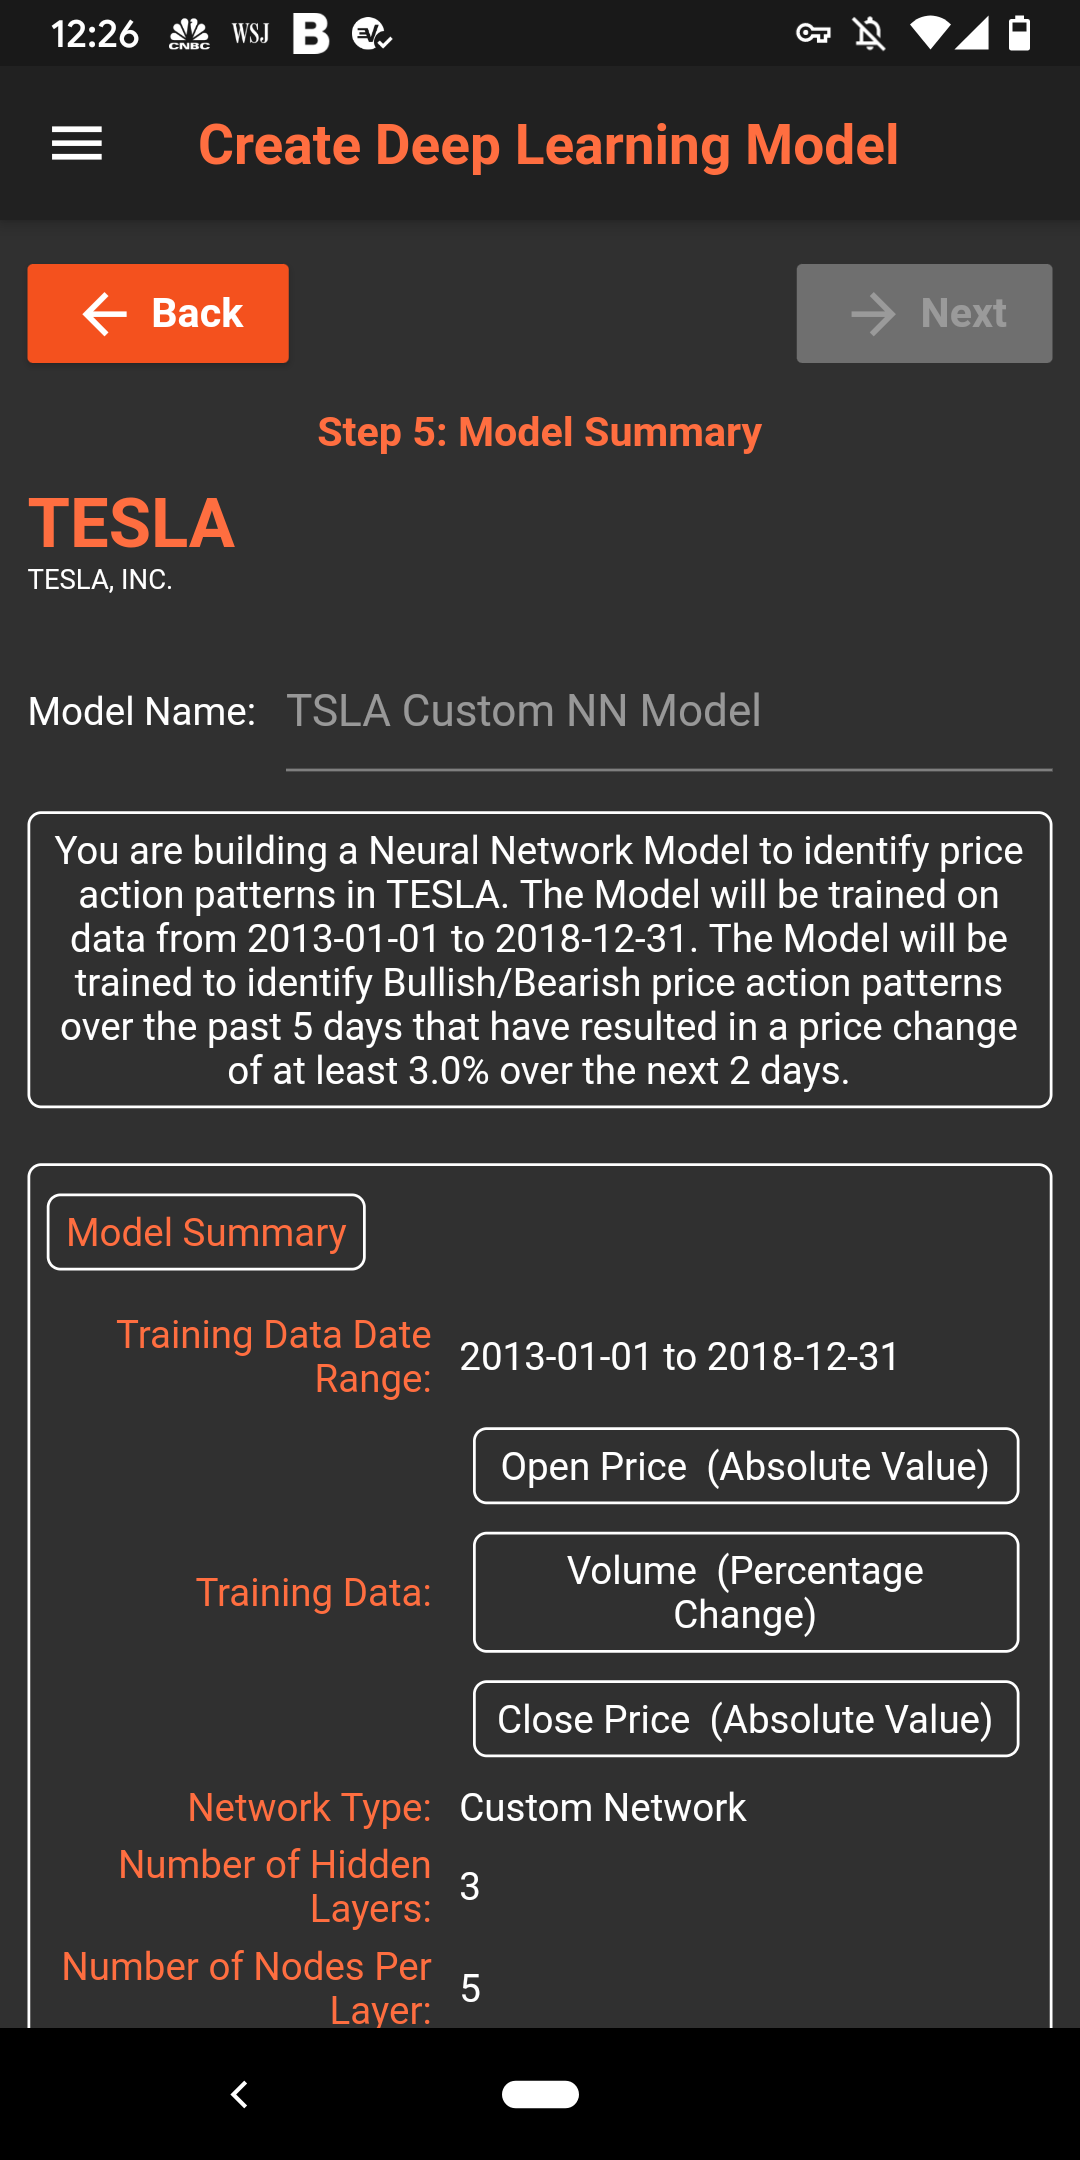
Step 2: Select the metrics you want to use and the date range. While all inputs to the Neural Network will be normalized for optimal performance, choose between Absolute Value and Percentage Change depending on whether you want to train on key levels or the relative change day over day. Here we use the absolute values of the open/close price and the percentage change in trade volume. Also note, in this instance we have chosen not to run the training till the current date. This is just to illustrate the performance of the Model on out of sample data.
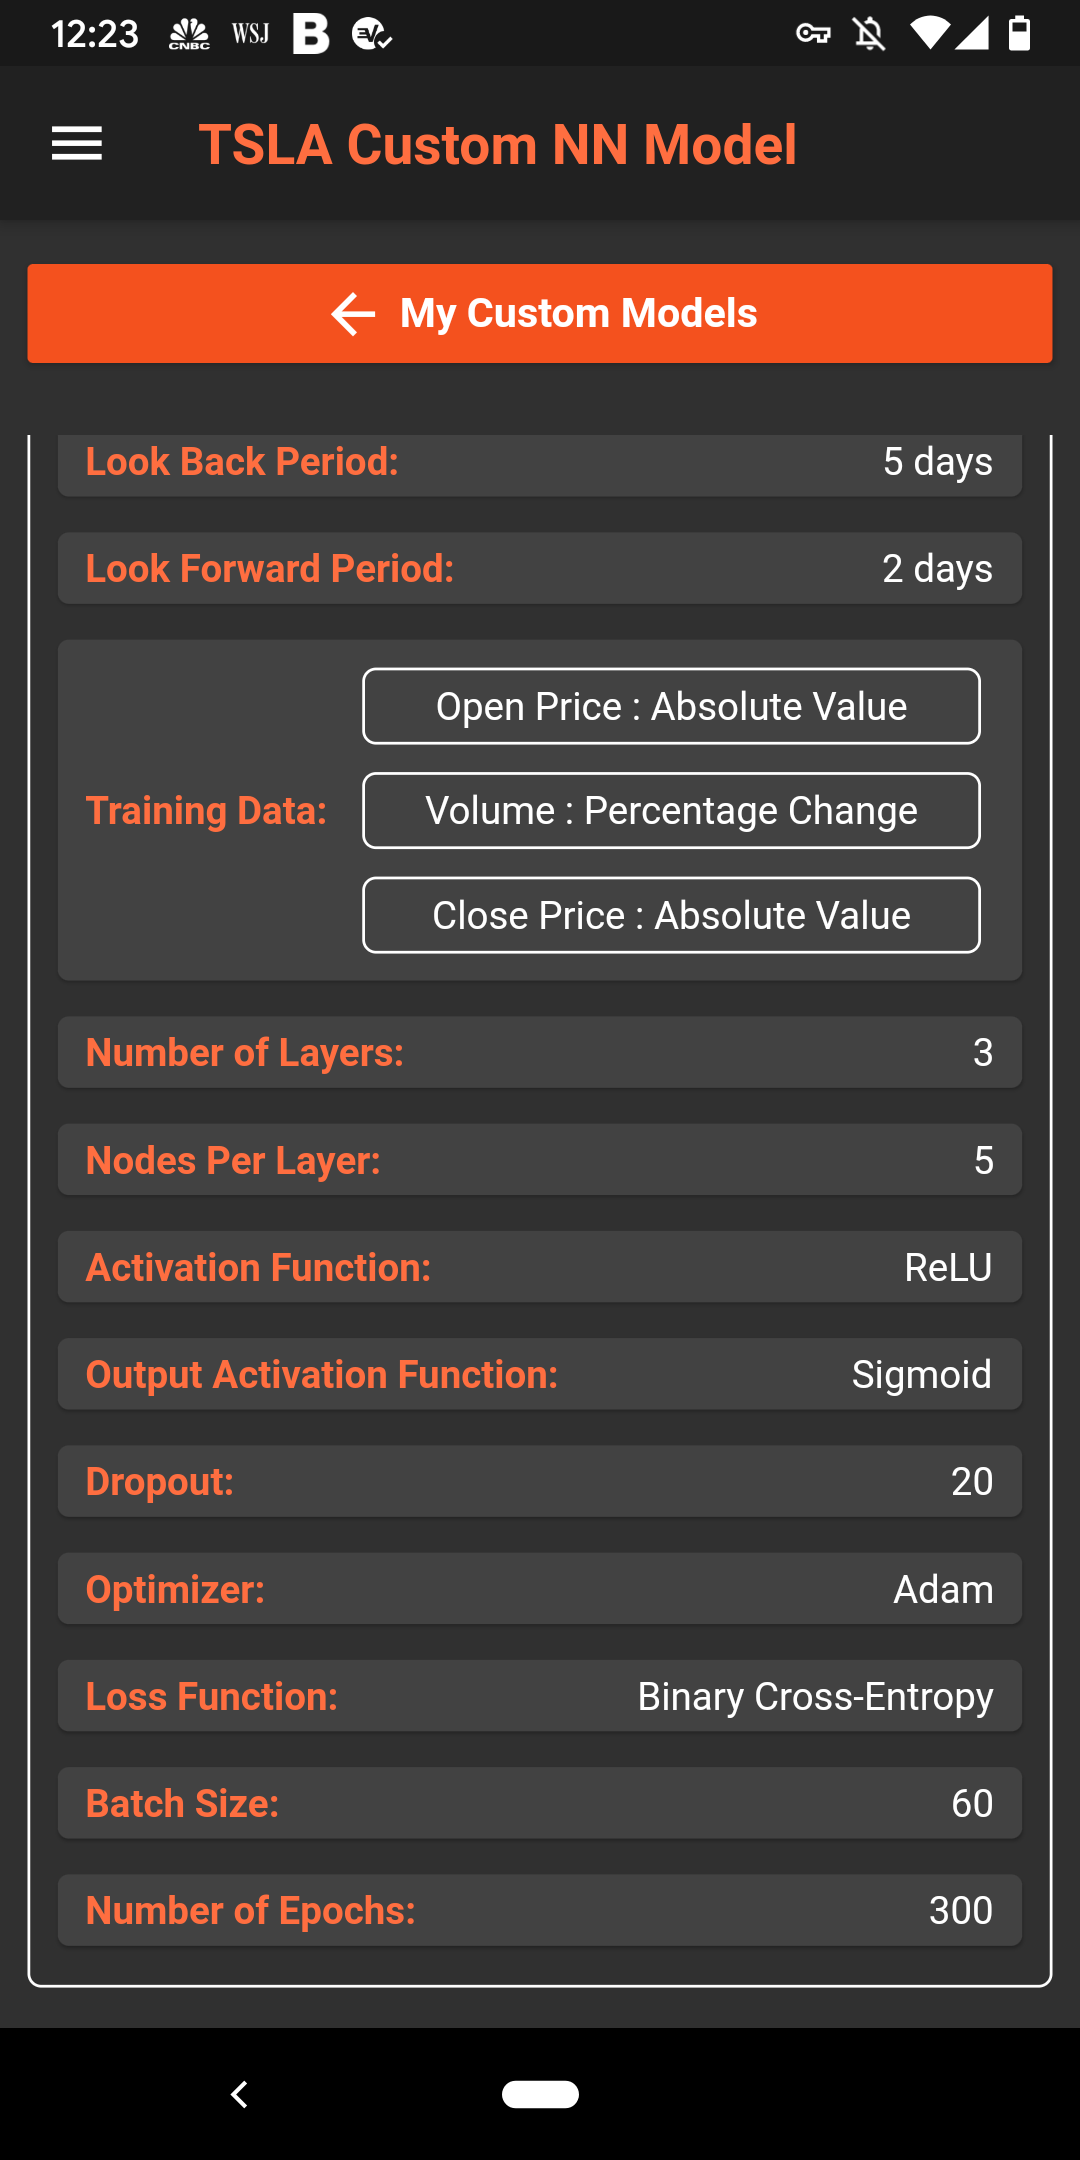
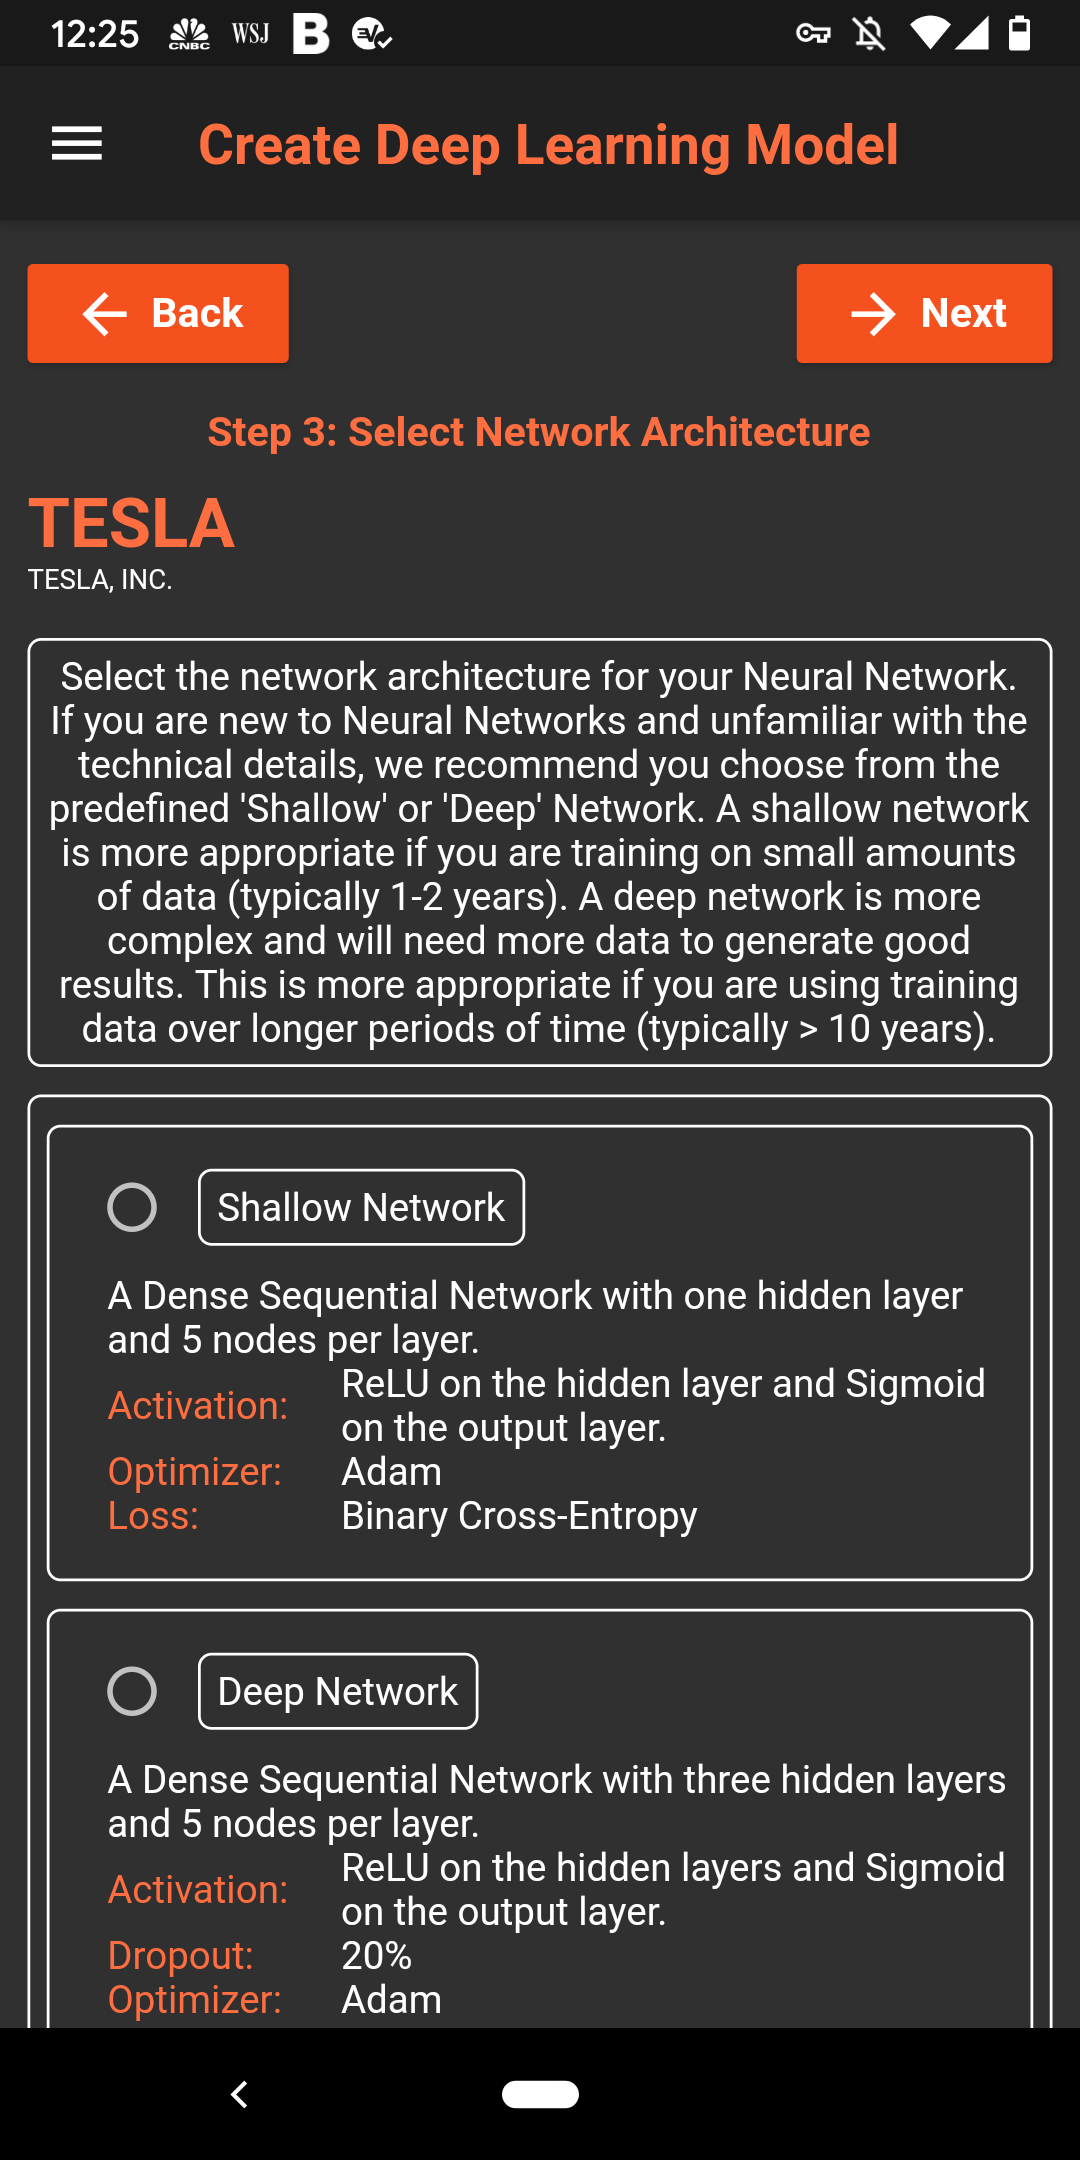
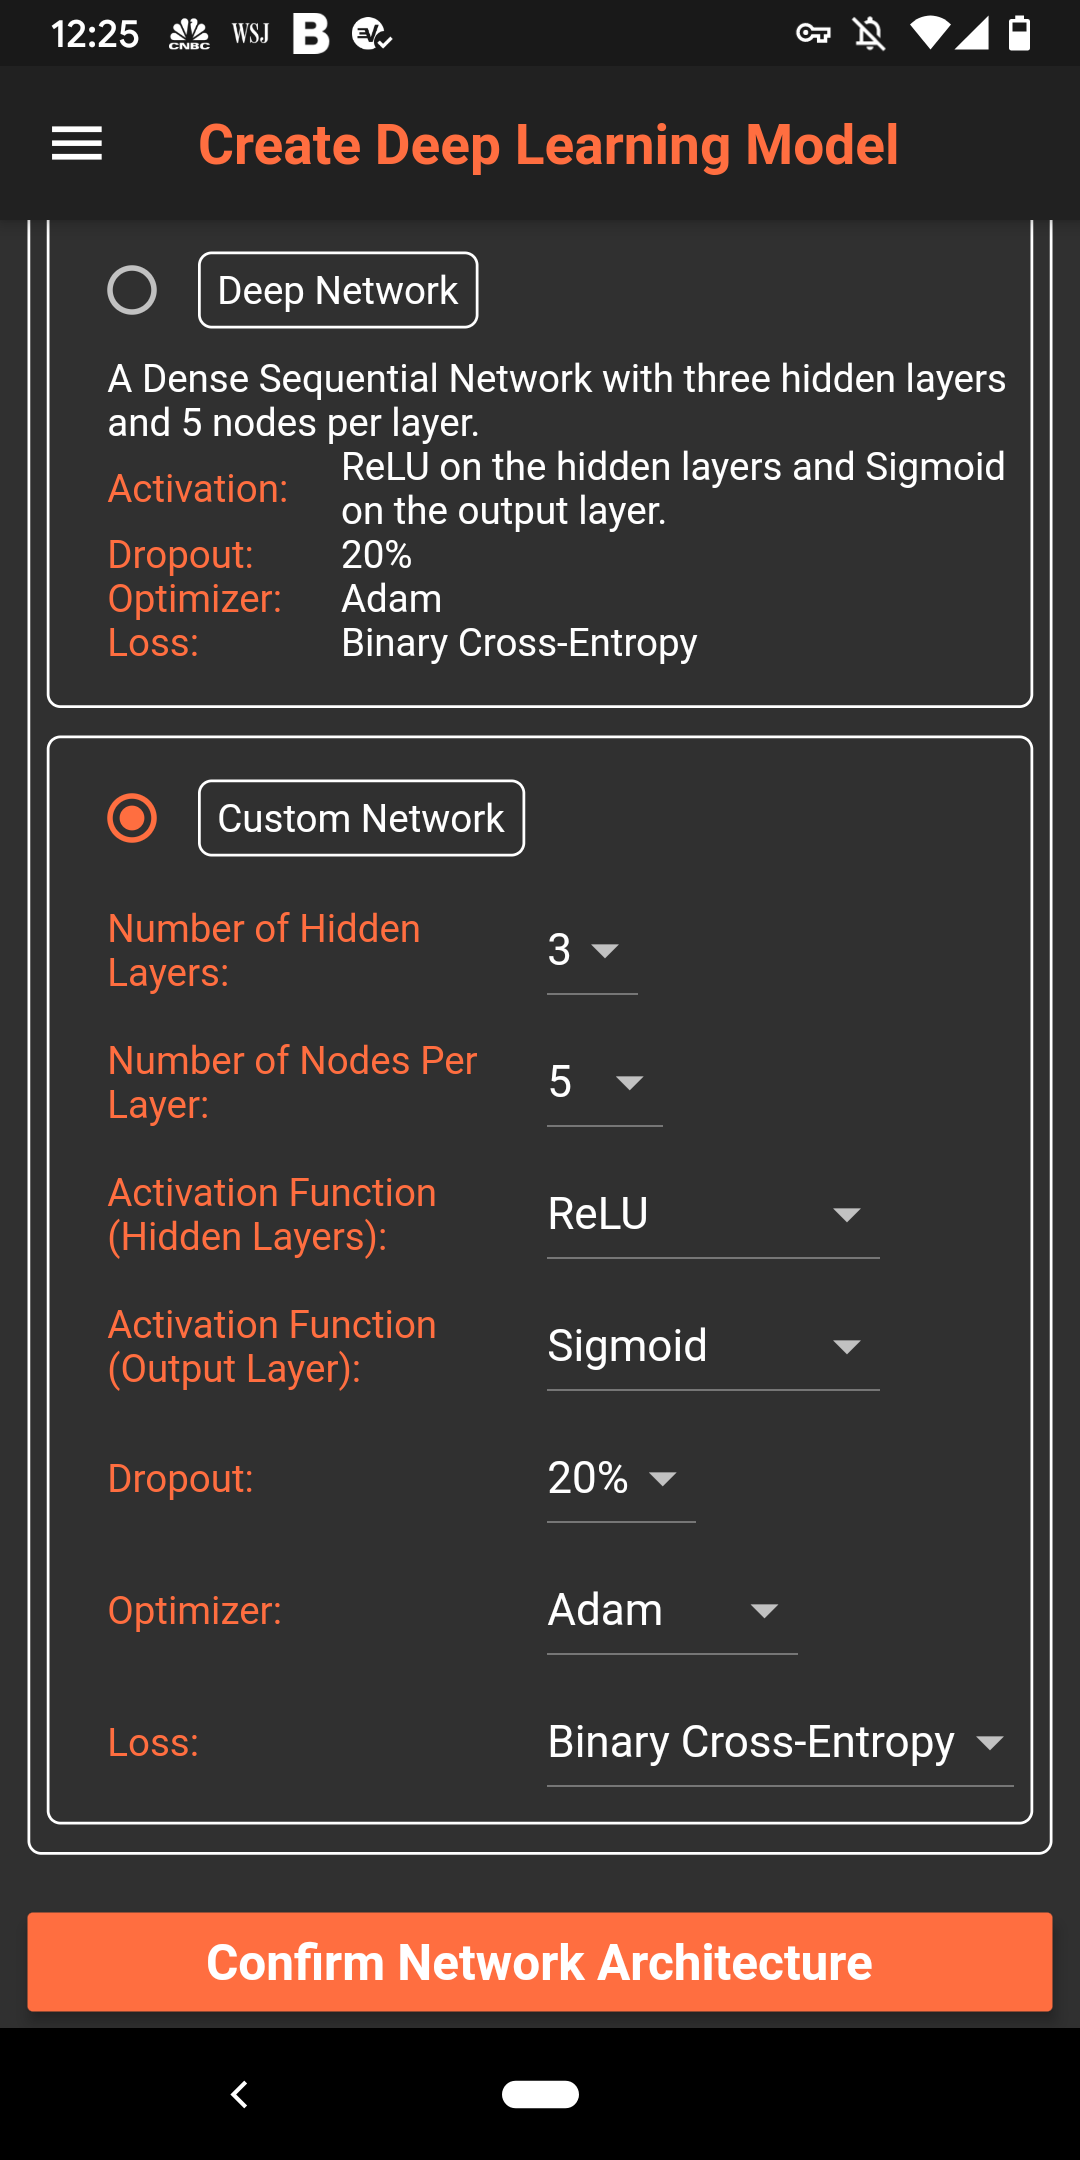
Step 3: Now you can select how you want to structure your Neural Network. You can choose to use our predefined network or customize it. Here we specify a custom network with 3 hidden layers and 5 nodes per layer.
Supported Activation Functions: Linear, Sigmoid, Hard Sigmoid, TanH, ReLU, Softsign, Softplus, ELU, Softmax
Supported Optimizers: Stochastic gradient descent (SGD), RMSProp, Adagrad, Adadelta, Adam, Adamax, Nadam
Supported Loss Functions: Mean Squared Error, Mean Absolute Error, Mean Squared Logarithmic Error (MSLE), Log-Cosh, Poisson, Cosine Proximity, Binary Cross-Entropy
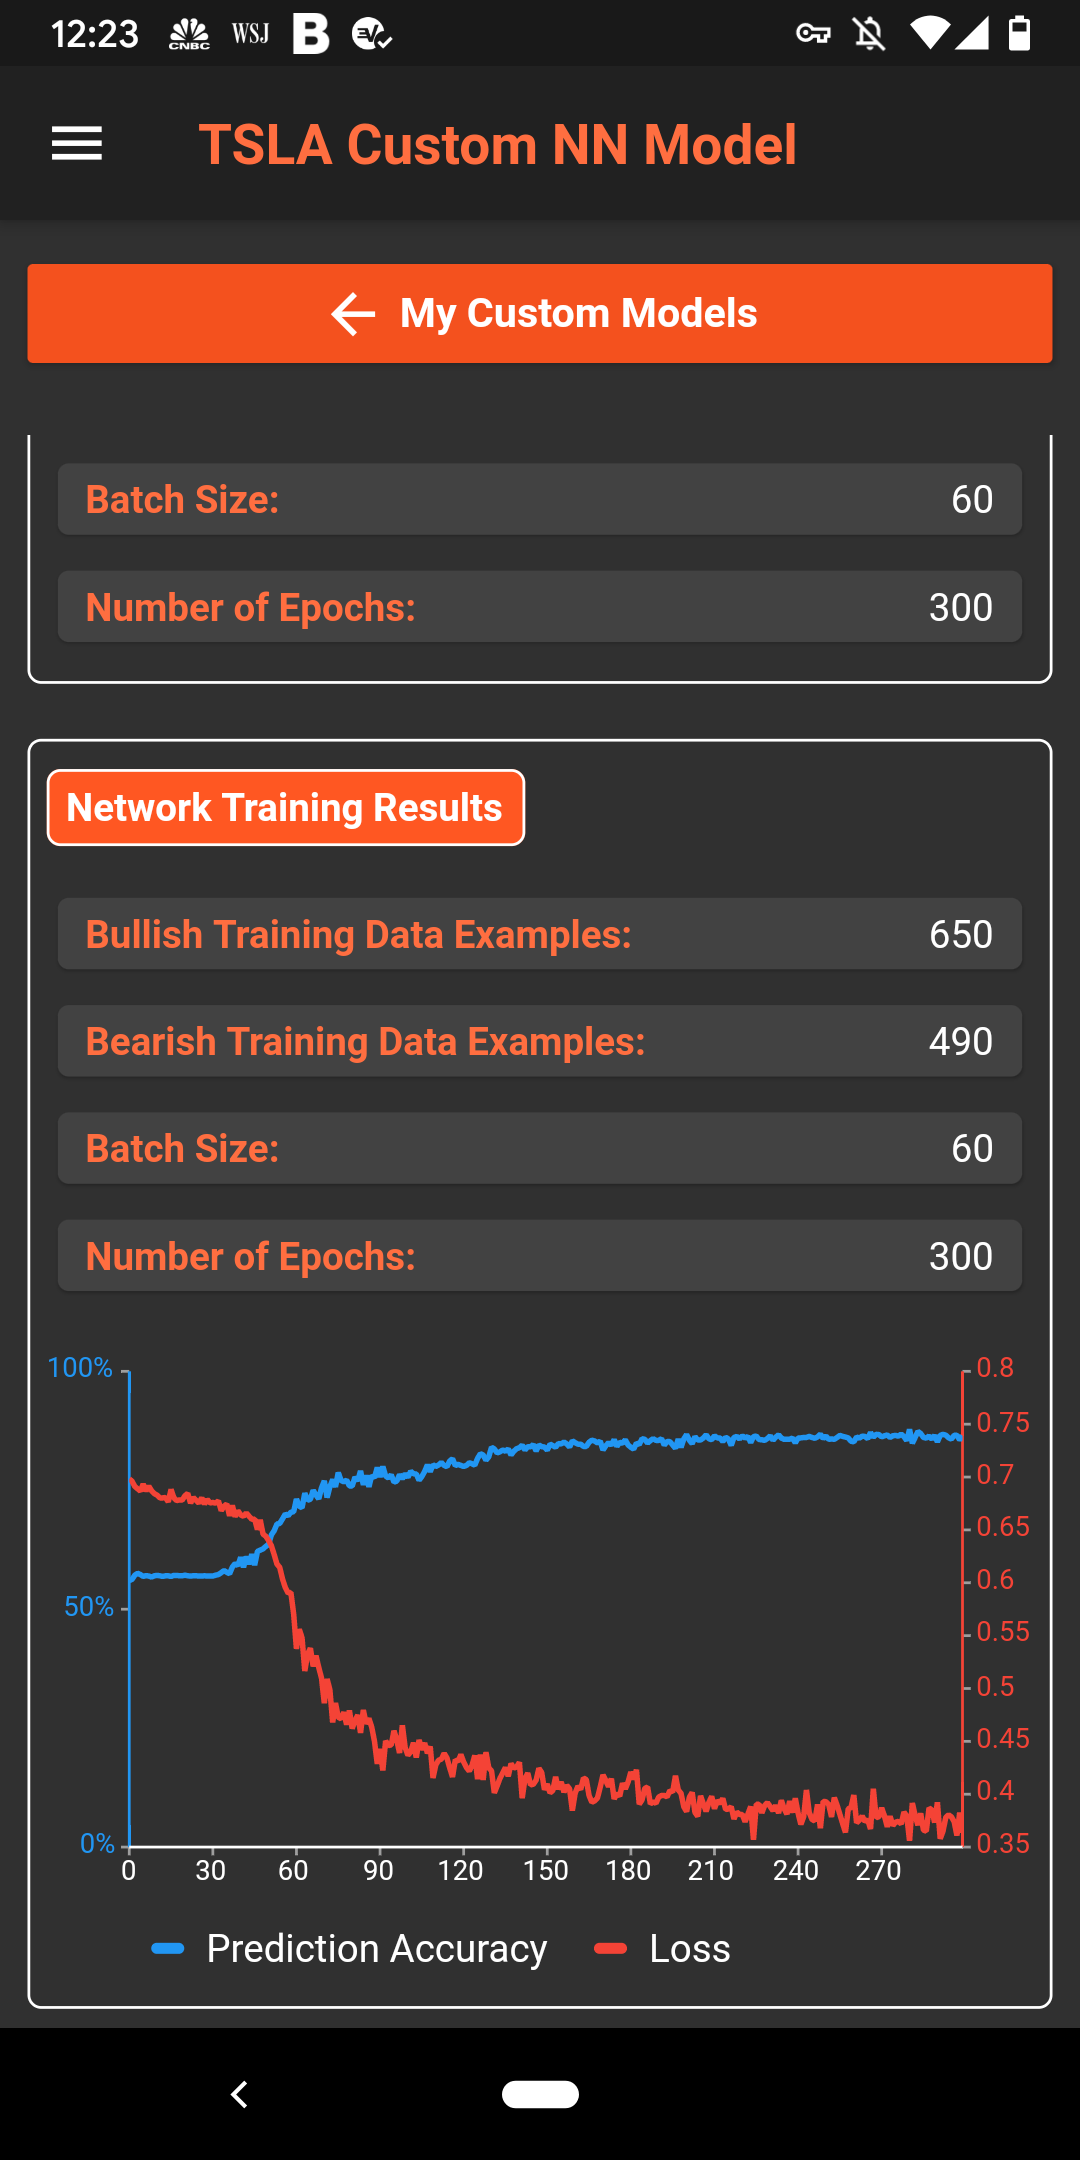
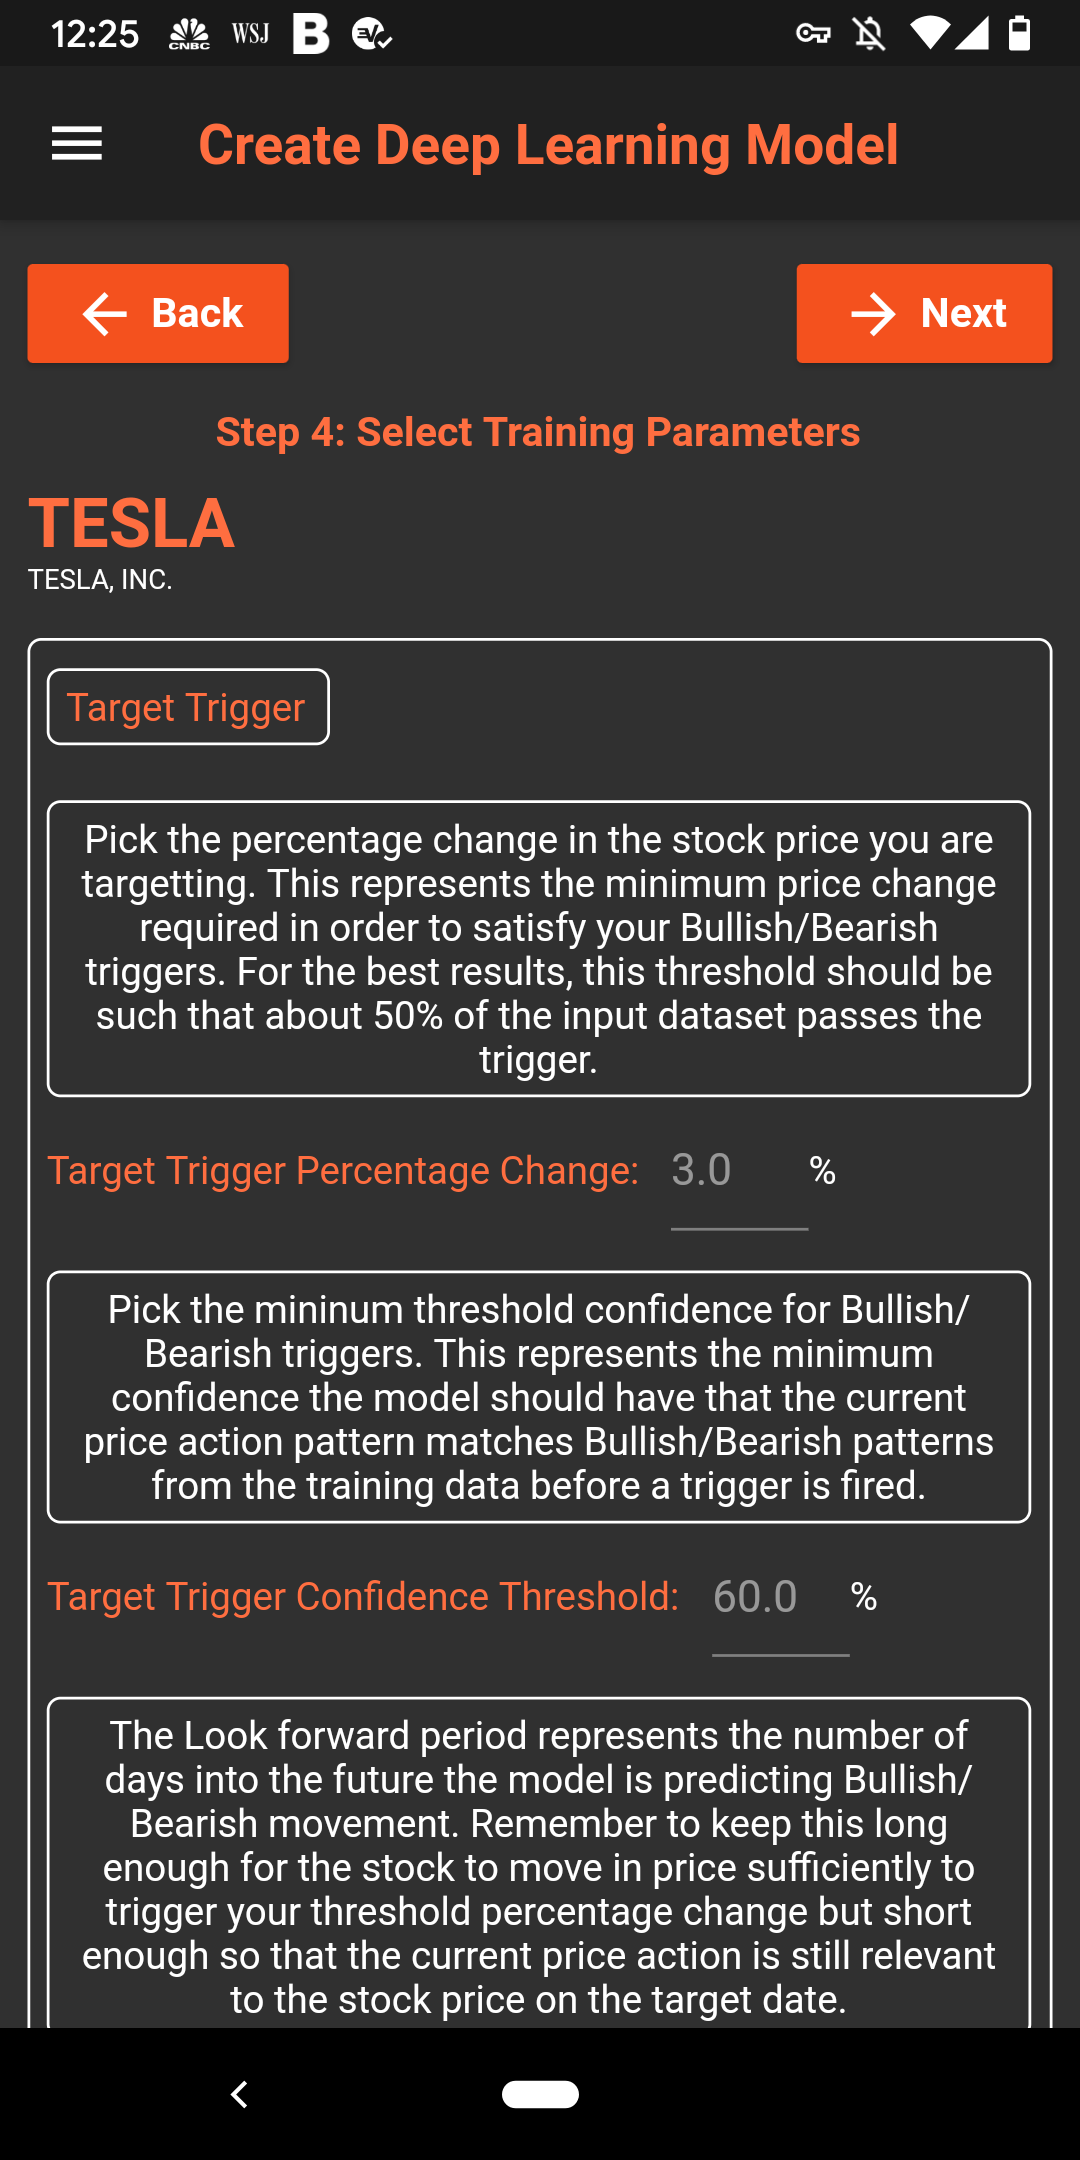
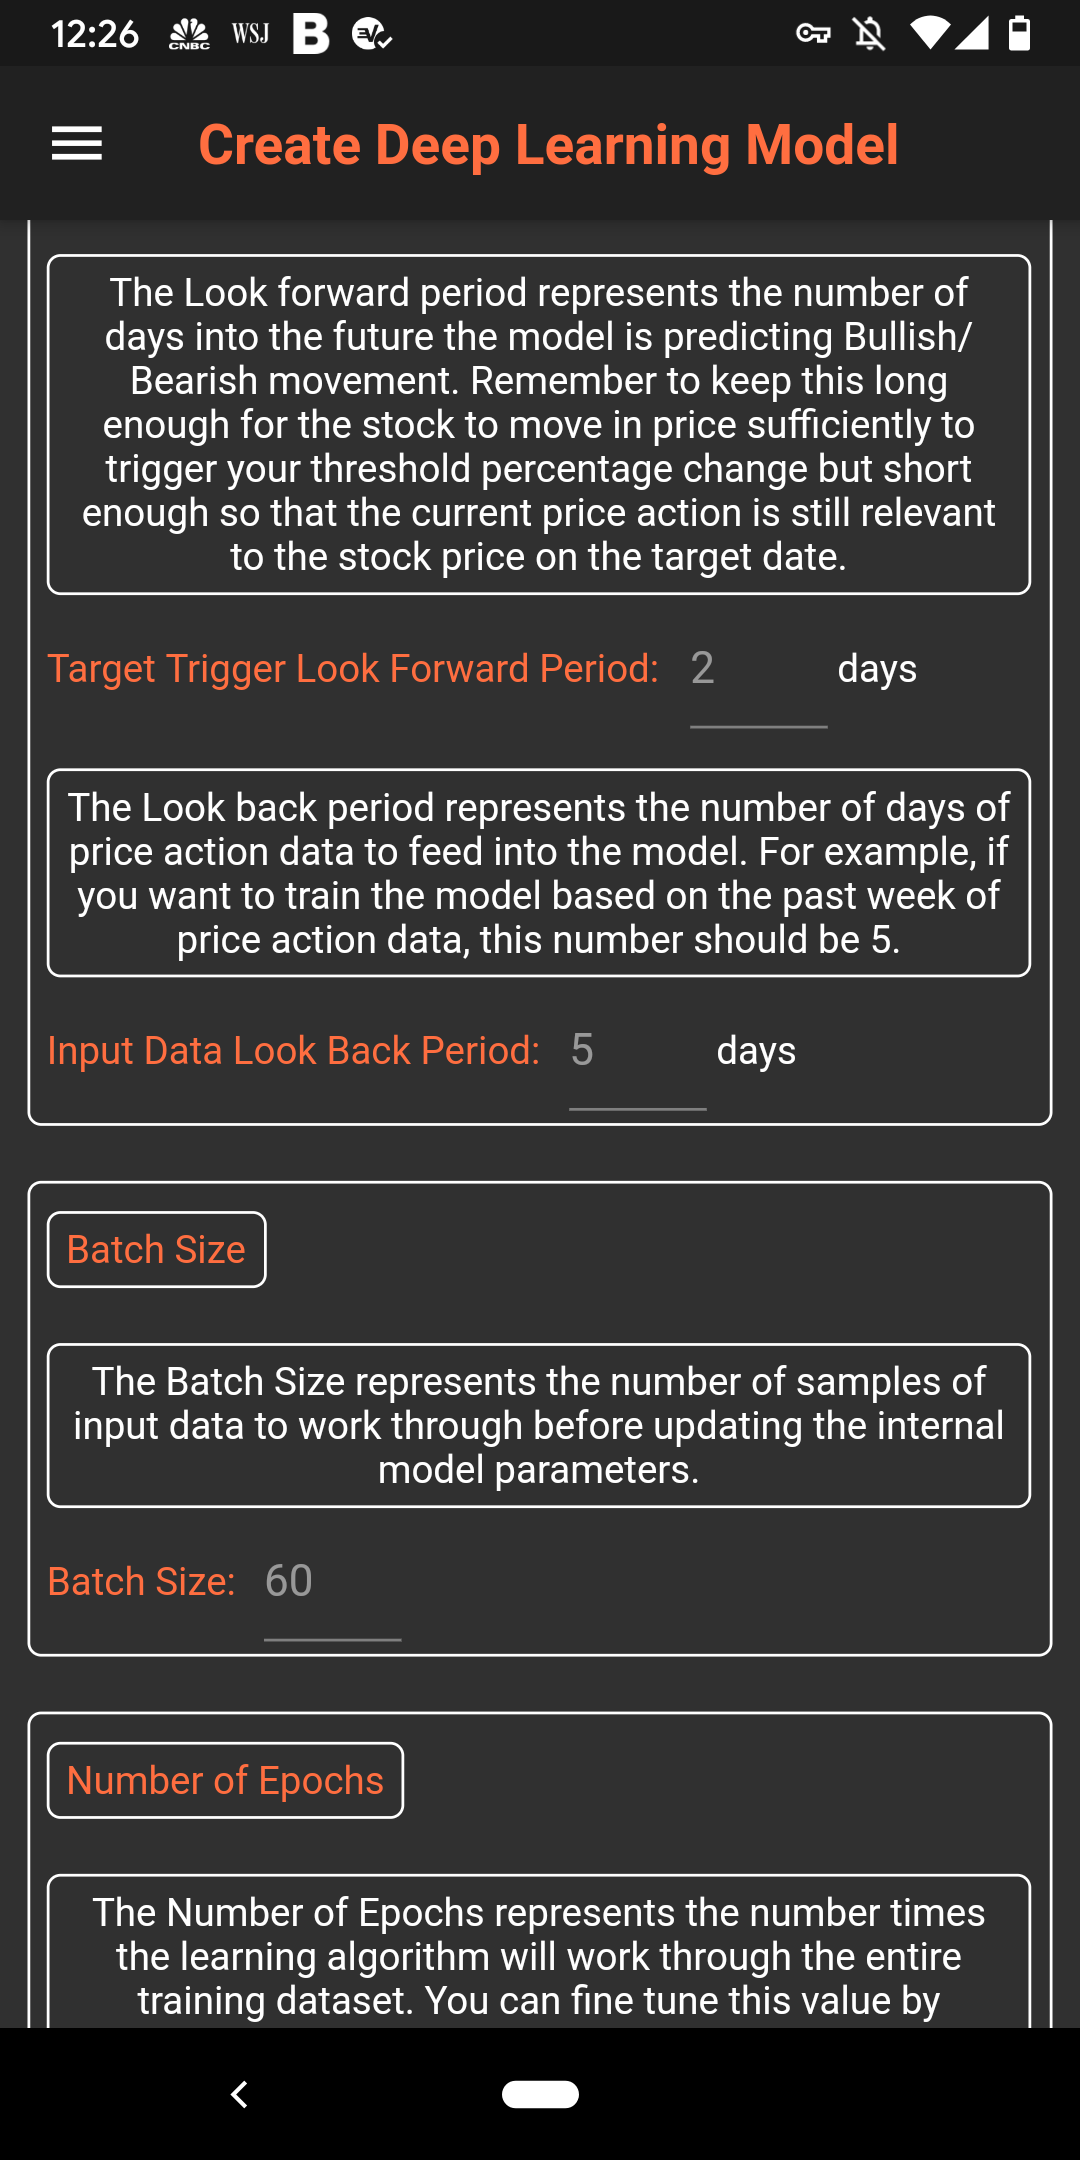
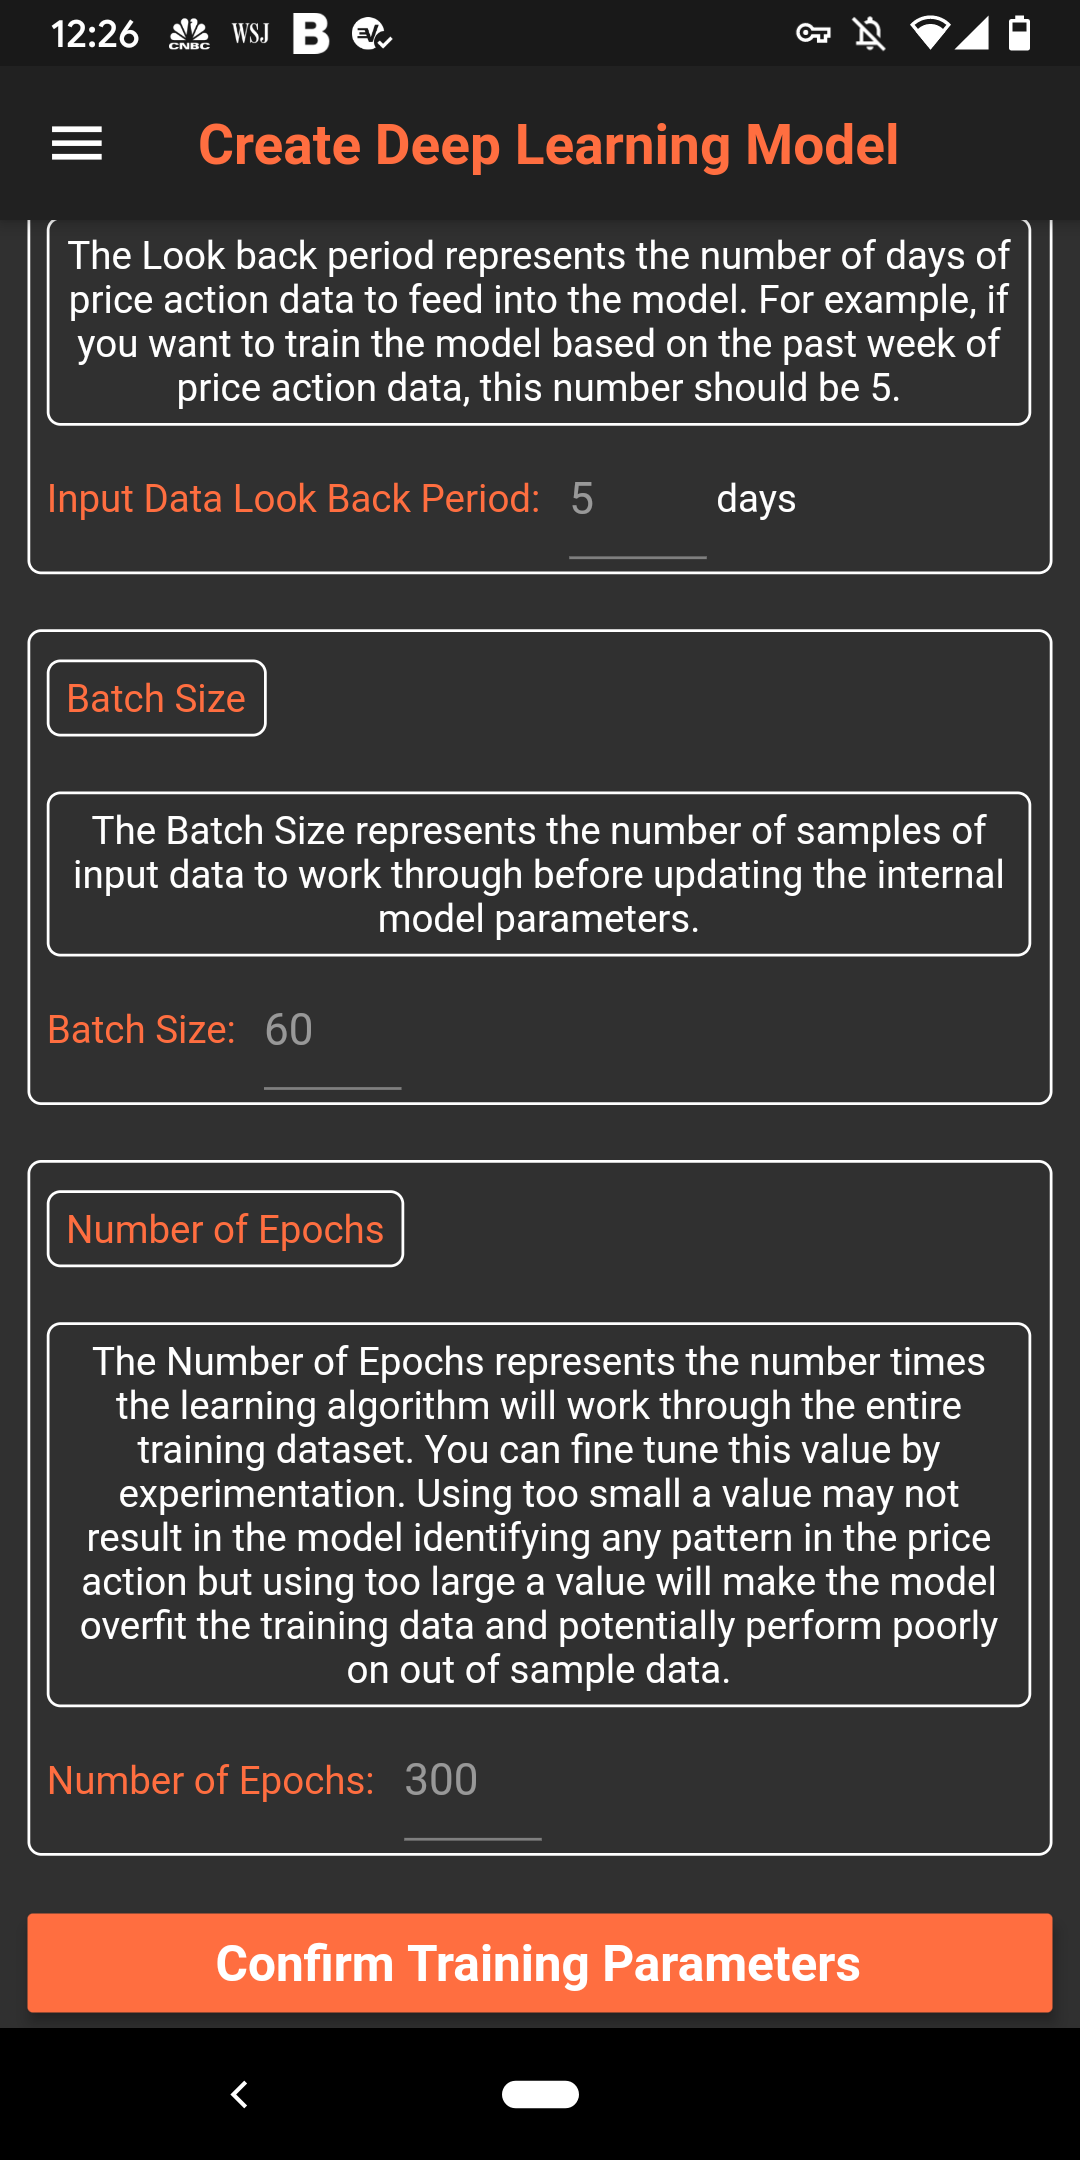
Step 4: Select the mininum percentage price change you want to trigger a bullish/bearish pattern signal. Using too low a threshold here may lead to a lot of noise in the input data and using too high a value may result in too few input examples. We recommend using a value in the 2-3% range and updating the input in subsequent runs based on the results from the model. Select the values for a few other input fields - you will find a brief explanation for what each field means next to the field.
Step 5: And you are done! It is really that simple. Review the inputs to your model and hit submit!

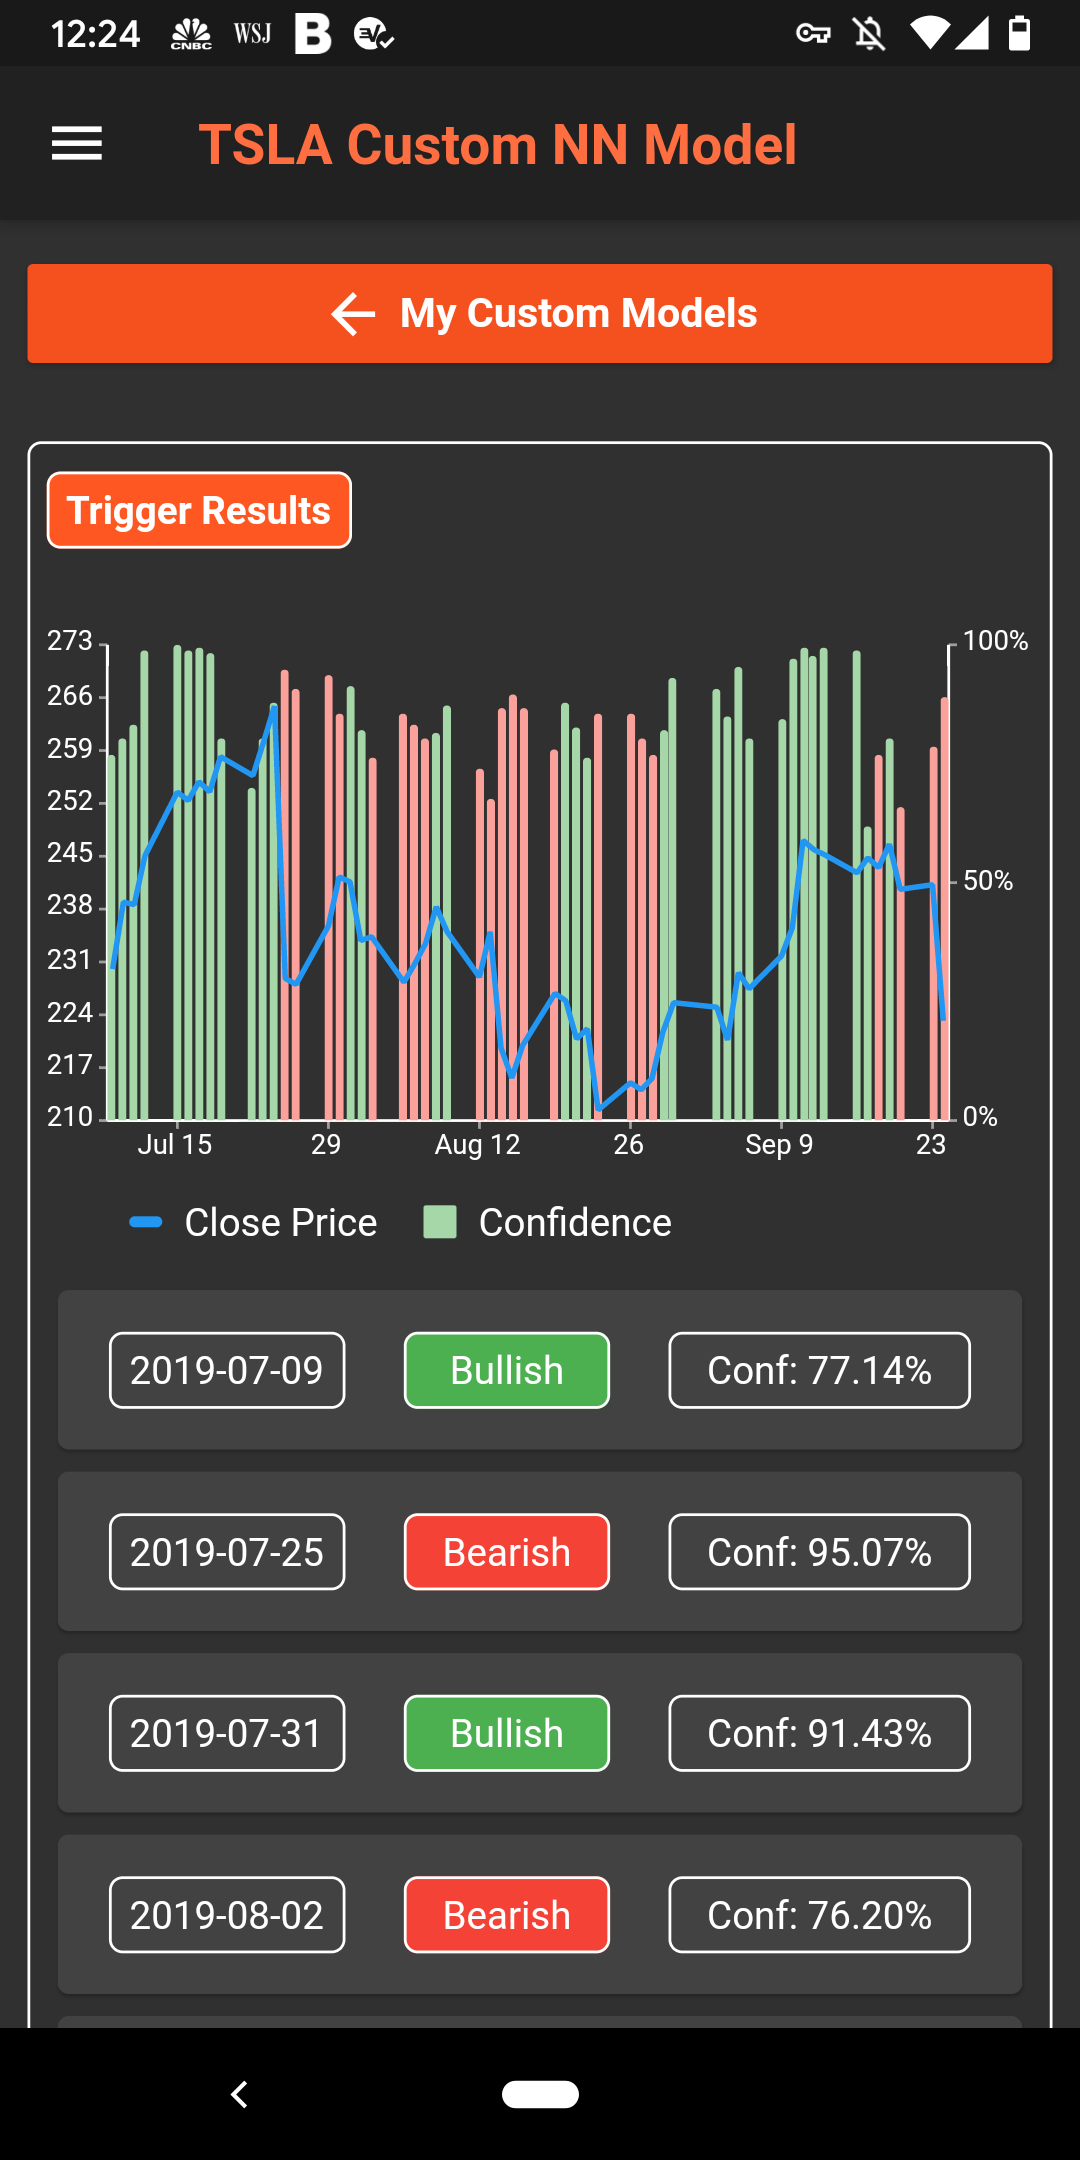
The processing may take about 10 minutes or more based on the model parameters you have chosen and the load on our servers. Note in this case because we used older training data, all of the model projection is on out of sample data. In practice though, it is best to use all data up to the current date to incorporate the most recent price action trends.